ntroduction
The reason for publishing this article is that I think that a lot of
people are going to use the new .NET 3.0 WCF. It is simple to use, and
seems very powerful. I have spend
a lot of time debugging this
program, and I hope that this article will prevent other people from
getting the same headache that I had because of a funny security
exception that I would get all the time. Use the code directly or as an
inspiration. I assume that the reader is familiar with client/server
coding, and will therefore not get into details. It is said that WCF is
very dynamic regarding the transfer methods, and can be configured to
use almost
any communication standard which makes it suitable for
many client/server applications. It does not matter if you use HTTP,
TCP etc., to transfer data, and the optional SSL / Encryption makes the
WCF even more suited for large scale solutions.
Background
The project is straightforward, really. The source contains some
files that I used to develop the application. The source contains the
ServiceLibrary that is the contract compiled into a simple DLL. Don't
confuse the difference between the
contract and the
proxy.
The contract is a sort of a way to communicate, and the proxy is a way
to get access to another remote contract. The other two libraries are
almost self-explaining, the WCFClient and the WCFService. The goal was
to create a dynamic client server solution that is
not bound by
configuration files etc., but is more dynamic. Plus don't underestimate
the fun writing the code :) Thanks to Gedebuk, Denmark.
The
Proxy.cs code is auto-generated by
svcutil.exe. If you need to re-create the
Proxy.cs, start the service and run the command:
"C:\Program Files\Microsoft SDKs\Windows\v6.0\Bin\svcutil.exe" http://localhost:8001/MyService /out:Proxy.cs.
Using the code
The code consists of two folders that are loaded into one project file.
How did I create the project?
In this section, I will describe how I created the project. The steps are listed in sequence and are numbered.
1) Creating the ServiceLibrary.cs
I created the project by starting off with the
ServiceLibrary. This library is compiled into a DLL which is used on the client (or clients for that matter). In WCF terms, this is the
contract that the client must obey in order to be able to communicate with the server. This
contract is in fact an
interface that the client(s) communicates through. The
ServiceLibrary
contains all the methods that can be called by the client. In this
example, it also holds the implementation for the service. The
DataContract has the mark
[DataContract]
that indicates that it's an object that can be transferred. In WCF, it
does not matter if it is a simple type, like a string, or a complex type
like an object that is transferred over the wire. Below is a copy/paste
from my
contract.
 Collapse | Copy Code
using System;
using System.Collections.Generic;
using System.Text;
using System.ServiceModel;
using System.Runtime.Serialization;
namespace ServiceLibrary
{
[ServiceContract()]
public interface IService1
{
[OperationContract]
string MyOperation1(string myValue);
[OperationContract]
string MyOperation2(DataContract1 dataContractValue);
[OperationContract]
string HelloWorld(string str);
}
public class service1 : IService1
{
public string MyOperation1(string myValue)
{
return "Hello: " + myValue;
}
public string MyOperation2(DataContract1 dataContractValue)
{
return "Hello: " + dataContractValue.FirstName;
}
public string HelloWorld(string str)
{
return "Helloworld from " + str;
}
}
[DataContract]
public class DataContract1
{
string firstName;
string lastName;
[DataMember]
public string FirstName
{
get { return firstName; }
set { firstName = value; }
}
[DataMember]
public string LastName
{
get { return lastName; }
set { lastName = value; }
}
}
}
The code is something that the Visual Studio project generates for
me. I've only added the HelloWorld part of this code. The VS environment
did also generate a
how-to on
Adding a Service Reference.
I've skipped that and deleted those parts. You can either configure the
program from a configuration file that is a part of Visual Studio, or
add the configuration in the code, or code the configuration. I have
chosen to configure the service inside the code. One would argument
about the ease of changing an XML file instead of recompiling the
project if changes in the client/server relation occurs, but I have
chosen to do this in order for the program to be able to configure
itself in future implementations. This code will act as a core function
in a rather large client/server solution where computers will contact
other computers randomly via WCF. This requires the program to be able
to change the runtime, and is the main reason for this code to be
controlled
in-code.
2) Creating the Service-Host Application
The service-host application is the program that holds the service that has the actual objects. This is the
server if you like to call it that.
I created a Windows Forms project and added the following code:
Collapse | Copy Code
using System;
using System.Collections.Generic;
using System.ComponentModel;
using System.Data;
using System.Drawing;
using System.Text;
using System.Windows.Forms;
using System.Net;
using System.ServiceModel;
using System.ServiceModel.Description;
namespace WCFService
{
public partial class MainForm : Form
{
private ServiceHost host = null;
private string urlMeta, urlService = "";
public MainForm()
{
InitializeComponent();
Append("Program started ...");
}
void host_Opening(object sender, EventArgs e)
{
Append("Service opening ... Stand by");
}
private void button1_Click(object sender, EventArgs e)
{
try
{
IPHostEntry ips = Dns.GetHostEntry(Dns.GetHostName());
IPAddress _ipAddress = ips.AddressList[0];
urlService = "net.tcp://" +
_ipAddress.ToString() + ":8000/MyService";
host = new ServiceHost(typeof(ServiceLibrary.service1));
host.Opening += new EventHandler(host_Opening);
host.Opened += new EventHandler(host_Opened);
host.Closing += new EventHandler(host_Closing);
host.Closed += new EventHandler(host_Closed);
NetTcpBinding tcpBinding = new NetTcpBinding();
tcpBinding.TransactionFlow = false;
tcpBinding.Security.Transport.ProtectionLevel =
System.Net.Security.ProtectionLevel.EncryptAndSign;
tcpBinding.Security.Transport.ClientCredentialType =
TcpClientCredentialType.Windows;
tcpBinding.Security.Mode = SecurityMode.None;
host.AddServiceEndpoint(typeof(
ServiceLibrary.IService1), tcpBinding, urlService);
ServiceMetadataBehavior metadataBehavior;
metadataBehavior =
host.Description.Behaviors.Find<ServiceMetadataBehavior>();
if (metadataBehavior == null)
{
metadataBehavior = new ServiceMetadataBehavior();
metadataBehavior.HttpGetUrl = new Uri("http://" +
_ipAddress.ToString() + ":8001/MyService");
metadataBehavior.HttpGetEnabled = true;
metadataBehavior.ToString();
host.Description.Behaviors.Add(metadataBehavior);
urlMeta = metadataBehavior.HttpGetUrl.ToString();
}
host.Open();
}
catch (Exception ex1)
{
Console.WriteLine(ex1.StackTrace);
}
}
private void button2_Click(object sender, EventArgs e)
{
host.Close();
}
void host_Closed(object sender, EventArgs e)
{
Append("Service closed");
}
void host_Closing(object sender, EventArgs e)
{
Append("Service closing ... stand by");
}
void host_Opened(object sender, EventArgs e)
{
Append("Service opened.");
Append("Service URL:\t" + urlService);
Append("Meta URL:\t" + urlMeta + " (Not that relevant)");
Append("Waiting for clients...");
}
private void Append(string str)
{
textBox1.AppendText("\r\n" + str);
}
}
}
The interesting part is of course the
button1_Click
which creates the service and makes the service public to other clients.
Now for other clients to connect to this service, the service needs a
contract. The contract is not something that one would write themselves, and that's why I use the
scvutil.exe tool. On my PC, the tool is located at
C:\Program Files\Microsoft SDKs\Windows\v6.0\Bin\svcutil.exe. In order to make the contract
object (that is actually the proxy that clients connect to), we need to generate
Proxy.cs (the name of the file is not relevant at all, could be
foo.cs as well). This will happen in step 3.
3) Building the Proxy Object for Clients to Use
The proxy object is built from the service description that is
located on port 8001 (check the code). It reads the meta data from the
service, and constructs the contract that is needed by clients when they
want to communicate with the service.
- First, start the service and hit the "Start service" button. This
creates the service. All meta info is published for other clients or
tools to read them.
- Second, run "C:\Program Files\Microsoft SDKs\Windows\v6.0\Bin\svcutil.exe" http://localhost:8001/MyService /out:Proxy.cs. This creates two files. A Proxy.cs
file and an XML config file. I discard the config file because I'll
configure the service inside the program. You should consider putting
the "C:\Program Files\Microsoft SDKs\Windows\v6.0\Bin\svcutil.exe" http://localhost:8001/MyService /out:Proxy.cs in a bat file to make it easier for yourself. I have included my bat file for you to see. It resides in the "ProxyGenerator" folder.
Next, I create a simple client and add relevant code to it.
4) Creating a Client Application and Adding Relevant Code to it
Now, we create a simple standard client program as a Windows Forms apllication. Once the files are generated (
Proxy.cs and
output.config <- can be suppressed), I add the
Proxy.cs to my client program which is called
WCFClient.
Now, the client knows the contract and is able to obey it in order to
create a communication channel to the service. One could compile the
Proxy.cs into a DLL and simply add the DLL to the client (a cleaner way to add something that is crucial as a communication contract or
interface, I think). For demonstration, we leave the
Proxy.cs
as it is and add it to the client project. Next, and the last step: we
need to add some simple client code in order to retrieve the service
proxy object. My client code looks like this:
Collapse | Copy Code
using System;
using System.Collections.Generic;
using System.ComponentModel;
using System.Data;
using System.Drawing;
using System.Text;
using System.Windows.Forms;
using System.ServiceModel;

namespace WCFClient
{
    public partial class Form1 : Form
    {
        string endPointAddr = "";

        public Form1()
        {
            InitializeComponent();
        }

        private void button1_Click(object sender, EventArgs e)
        {
            if (textBox1.Text != "")
            {
                endPointAddr = "net.tcp://" + textBox2.Text +
                               ":8000/MyService";
                NetTcpBinding tcpBinding = new NetTcpBinding();
                tcpBinding.TransactionFlow = false;
                tcpBinding.Security.Transport.ProtectionLevel =
                  System.Net.Security.ProtectionLevel.EncryptAndSign;
                tcpBinding.Security.Transport.ClientCredentialType =
                  TcpClientCredentialType.Windows;
                tcpBinding.Security.Mode = SecurityMode.None;

                EndpointAddress endpointAddress =
                   new EndpointAddress(endPointAddr);

                Append("Attempt to connect to: " + endPointAddr);

                IService1 proxy =
                  ChannelFactory<IService1>.CreateChannel(
                  tcpBinding, endpointAddress);

                using (proxy as IDisposable)
                {
                    Append("Message from server: " +
                      (proxy.HelloWorld(textBox1.Text) +
                      " back to you :)"));
                }
            }
        }

        private void Append(string str)
        {
            textBox3.AppendText("\r\n" + str);
Points of Interest
Well, I really had a lot of fun working with the code and writing the
article. The most impressive thing, in my opinion, is that the
transport layer very easily can be modified to use HTTP instead of TCP. I
did not point that out in the article but that's also something nice to
have. Being able to switch the transport layer from TCP (Secure SSL)
into HTTP with some simple code, that's amazing! I did have some
problems, though. The
tcpBinding.Security.Mode = SecurityMode.None;
is very crucial on both sides. I'm not sure what it does, but it does
not turn off the security completely as I have read in my references.
There is still SSL encryption, but on a lower level. It is possible to
add certificates to the connection, which also makes the connection more
secure.

Search in plain English No need to know the address. You can type a business name or even a kind of a business, just like you would on Google.
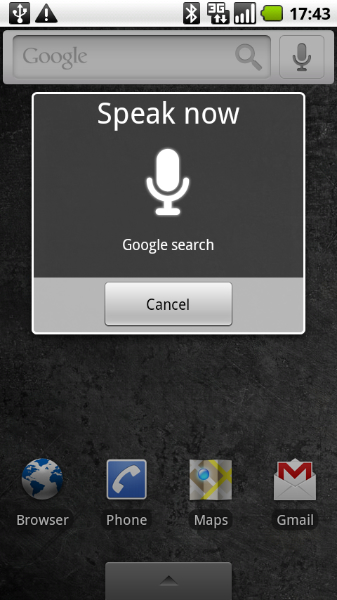
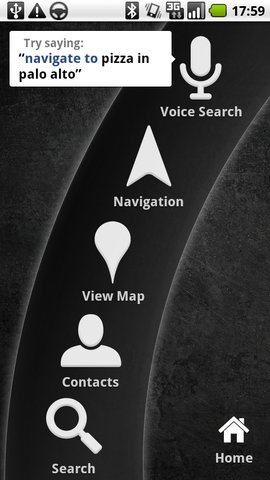
Search by voice Speak your destination instead of typing (English only): "Navigate to the de Young Museum in San Francisco".
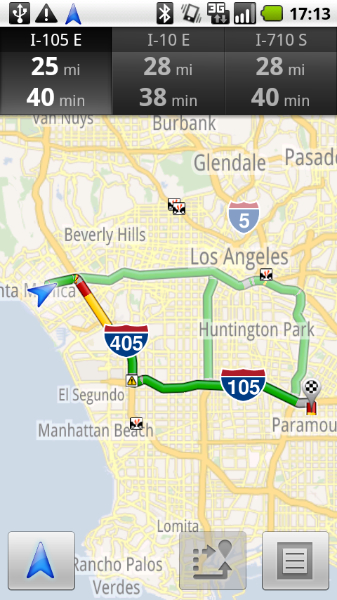
Traffic view An indicator glows green, yellow, or red based on the current traffic along your route. Touch it to see traffic ahead of you.
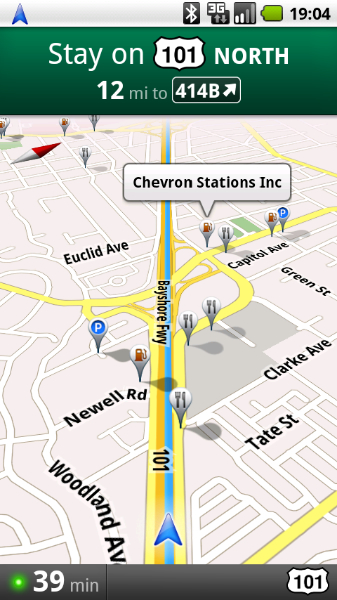
Search along route Search for any kind of business along your route, or turn on popular layers such as gas stations, restaurants, or parking.
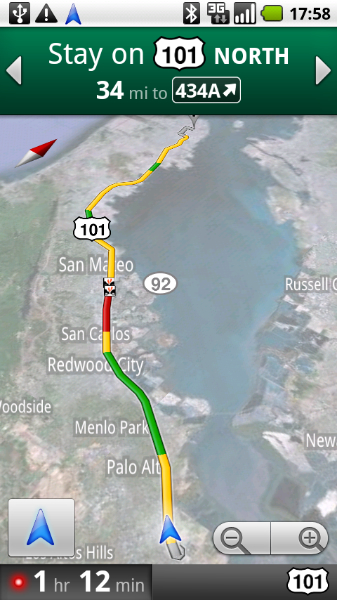
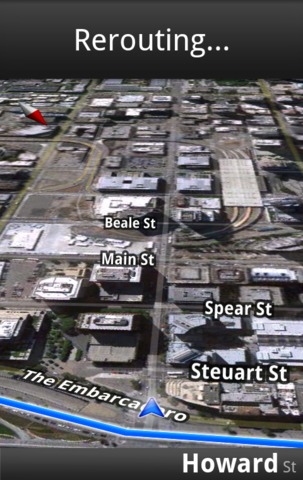
Satellite view View your route overlaid on 3D satellite views with Google's high-resolution aerial imagery.
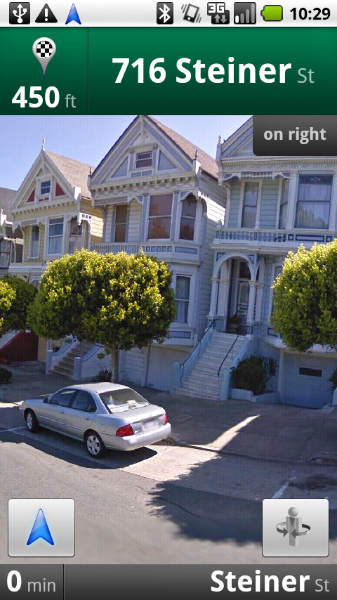
Street View Visualize turns with Street View imagery. Navigation automatically switches to Street View as you approach your destination.
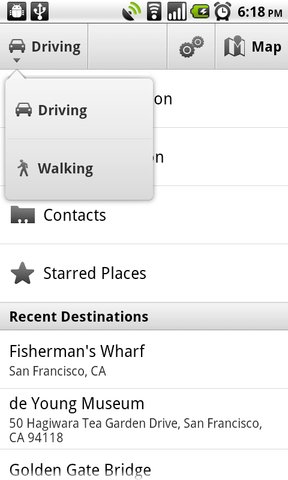
Car dock mode Car dock mode makes it easy to use your device at arm's length (Android 2.0 devices or higher).
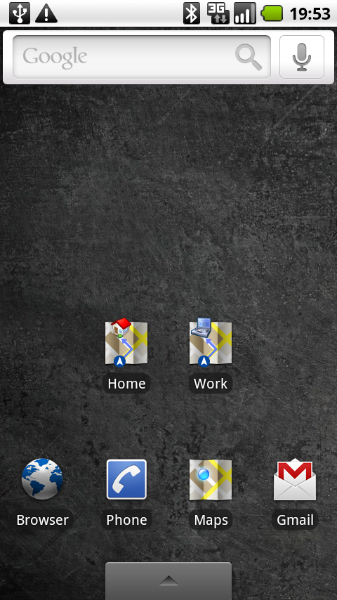
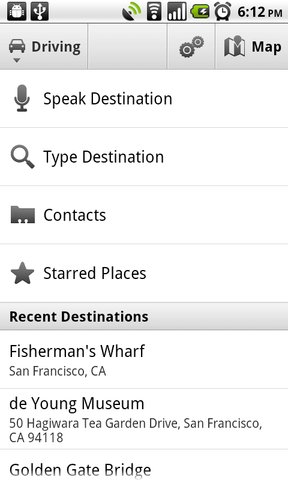
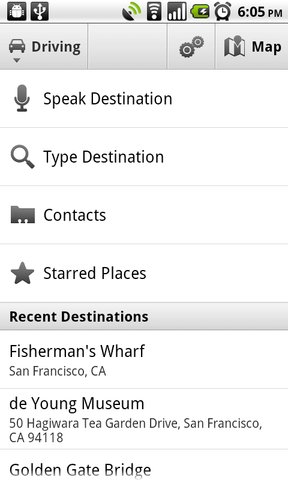
Navigation shortcut Select the Navigation icon from the launcher to start quickly; pick a destination by search (speak or type), contacts, starred items, or recent destinations.
Walking Navigation (Beta) Get voice-guided navigation for walking directions. Device vibrates for turn notifications.
Transit Navigation (Beta) New! Get navigation for public transit directions in 400 cities around the globe. Device shows location along transit route and provides alerts for when to stay on or exit public transit.
Offline reliability Get continuous guidance and automatic rerouting, even if you lose your network connection after you’ve begun a route.
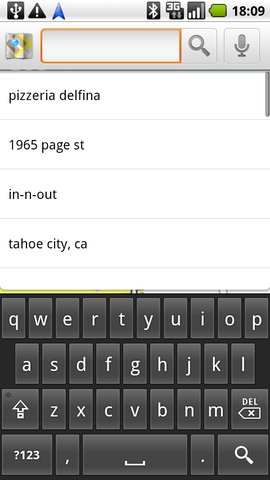


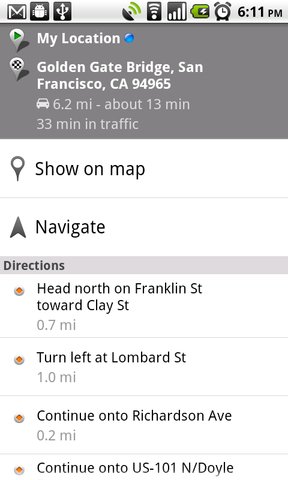
Search results
Alternate routes
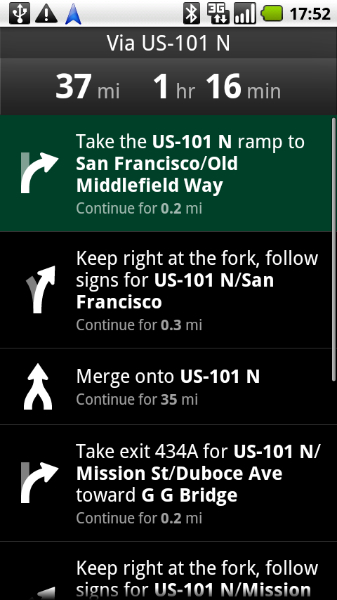
Directions list
Shortcuts
Traffic view
Satellite view
Satellite view
Street View
Street View
Search by voice
Satellite view with traffic
Navigate after getting directions
Popular search layers
Navigation shortcut
Google Maps Navigation