Introduction
One of the reason of LINQ (Language Integrated Query) being so
popular is that it offers so much flexibility to query through the
in-memory collection. In this article, I shall explain frequenlty used
extension methods of LINQ from System.Linq namespace.
Prerequisite
In order to understand this article, I assume that reader has basic knowledge of generic list collections and lamda expressions.
Lets get the datasource first
In order to demonstrate the use of extension methods, I have parepared a sample database table called "
SampleTutorials" that has
AutoId, Name, Address, City and Phone columns and then I have created a
Sample class.
I have following method that retrieves the data from database and add
into the generic list collection and returns that collection.
/// <summary>

/// Get list of sample records

/// </summary>

/// <returns></returns>

private IList<Sample> GetSampleList()

{


IList<Sample> list = new List<Sample>();

string sql = "SELECT * FROM SampleForTutorials ORDER BY AutoId DESC";

using (DataTable table = new DataTable())

{


// get the data now

using (SqlConnection conn = new SqlConnection(_connStr))

{


using (SqlCommand cmd = new SqlCommand(sql, conn))

{


cmd.CommandType = CommandType.Text;

conn.Open();

// get the data first

using (SqlDataAdapter ad = new SqlDataAdapter(cmd))

{


ad.Fill(table);
}

conn.Close();
}

foreach (DataRow row in table.Rows)

{


list.Add(new Sample() { Address = row["Address"].ToString(), AutoId = int.Parse(row["AutoId"].ToString()), City = row["City"].ToString(), Name = row["Name"].ToString(), Phone = row["Phone"].ToString() });
}
}
}

return list;
}
Above method is called from Page_Load method like this
IList<Sample> list = GetSampleList();
I have used above
list collection variable to show how the LINQ extension method works.
Get solutions of your .NET problems with video explanations, .pdf and source code in .NET How to's.
Frequently used LINQ Extension methods
SartsWith
StartsWith extension method is used to retrive all records from the
collection whose a particular field starts with certain characters or
string. In my case, I want to retrieve all records whose
Phone field starts with "Phone" and I will get all 5 records as this condition is satisfied by all 5 records in my database table.
// select all records whose Phone starts with "Phone"

var query1 = from sample in list


where sample.Phone.StartsWith("Phone")

select sample;
Output:

Average
Average extension method is used to get the average of a particular
column from the collection objets. In my case I want to get the average
of
AutoId, so I have specified it using lamda expressions (=>).
// gets the average of the specified column

var average = query1.Average(s => s.AutoId);
Contains
Contains extension method is used to retrieve all objects from the
collection whose field contains specified string. In my case I want to
get all records whose
Address contains "Nagar"
var query2 = from smp in query1


where smp.Address.Contains("Nagar")

select smp;
Output:

Concat
Concat is used to concatenate two collections. In my case I am concatenating
query2 into
query1 and storing into
queryConcat variable.
// Concates two collections of same type into onevar queryConcat = query1.Concat(query2);
Output:

Distinct
Distinct extension method is used to get the distinct records from
the collection (similar to sql server distinct keyword). In my case I
will get all 5 records as all 5 are distinct as displayed in the first
picture above.
// Distinct - gives distinct record

var distinctRecords = queryConcat.Distinct();
ElementAt
ElementAt extension method is used to get the element (object) from
the specified position in the collection. In my case I have specified 3
so this will give me the element at the 4th position (as it uses 0 based
index), refer the 1st picture at the top and it will give me the record
with AutoID = 7.
In case the position you have specified doesn't exsits in the collection, it throws error. To avoid error use next method.
// ElementAt - gives the record that is at nth position in the collection, if nth position doesn't exsits then throw error

var samp = query1.ElementAt(3);
ElementAtOrDefault
ElementAtOrDefault extension method is used to retrieve the specified
position element from the collection and if specified position doesn't
exists then it returns null.
// ElementAtOrDefault - gives the record that is at nth position in the collection if not found then returns null

var samp1 = query1.ElementAtOrDefault(4);
Except
Except extension method is used to retrieve all records from the collection that doesn't have in the second collection.
// Except - Get the list of collection that doesn't contain records from specified collection

var exceptColl = query1.Except(query2);
Output:

First
Gives first record from the collection, if collection doesn't have
any object then throws error. To avoid error, use next method.
// First - gives first record from the collection, if doesn't exsits then throws error

var first = query1.First();
FirstOrDefault
FirstOrDefault extension method is used to retrieve the first element from the collection, if not then gives null.
// FirstOrDefault - if record exsits then gives first record from the collection else returns nullvar firstDefault = query1.FirstOrDefault();
GroupBy
GroupBy extension method is used to retrieve the records grouped by
specified field. In this case, it will return records grouped by
City field.
// GroupBy - filters records grouping by a column valuevar groupBy = query1.GroupBy(s => s.City);
Intersect
Intersect extension method is used to retrieve the common records
from two collections. In my case I have retrieved all records that is
common in
query1 and
query2.
// Intersect - gives common records from two same types of collectionsvar intersect = query1.Intersect(query2);
Join
Join extension method is used to join two collections, I found this post very useful in understanding the Join method of LINQ
http://byatool.com/c/linq-join-method-and-how-to-use-it/
Last
Last extension method gives last element from the collection. If there is no element in the collection, it throws error.
// Last - gives last record from the collection, if not throws errorvar last = query1.Last();
LastOrDefault
LastOrDefault extension method gives the last element form the collection, if not gives null.
// LastOrDefault - gives last or default record from collection, if no records then gives nullvar lastOrDefault = query1.LastOrDefault();
Count and LongCount
Count and LongCount gives the count of elements from the collection,
if no parameter passed then gives total number of elements from the
collection else givers count of elements that meet the filter criteria.
In this case I am trying to count the elements whose
City is "Kolkata".
LongCount does the same work as Count, however gives System.Int64 value.
// Count - returns the total number of records in the collection, if passed the parameter then returns the count that satisfies the conditionvar kolCount = query1.Count(s => s.City == "Kolkata");


// LongCount does the same function that Count does however it is used to count large number of records

var kolLongCount = query1.LongCount(s => s.City == "Kolkata");
Max
Max gives the maximum value of the specified field from the
collection. In this case I am trying to retrieve the maximum value of
the
AutoId column so I will get 16.
// Max - returns the record that has maximum value in the specified column

var max = query1.Max(s => s.AutoId);
Min
Min gives the minimum value of the specified field from the
collection. In this case I am trying to retrieve the minimum value of
the
AutoId so I will get 4.
// Min - returns the record that has minimum value in the specified columnvar min = query1.Min(s => s.AutoId);
OrderBy
OrderBy extension method is used to sort the collection on specified field. In this case I am sorting the collection on
Name. It sorts the collection in ascending order.
// OrderBy - sort the collection in ascending order

var query1 = query1.OrderBy(sample => sample.Name);
OrderByDescending
OrderByDescending extension method is used to sort the collection in
descending order on specified field. In this case I am sorting the
collection in descending order on
Name.
// OrderByDescending - sort the collection in ascending ordervar query1 = query1.OrderByDescending(sample => sample.Name);
ThenBy
ThenBy is used with OrderBy or OrderByDescending. It is used to apply
sorting on already sorted collection using OrderBy or
OrderByDescending. For example, in my case I am first sorting the
collection by
Name and then by
City.
// OrderBy.ThenBy - sort the collection in ascending ordervar query1 = query1.OrderBy(sample => sample.Name).ThenBy(s => s.City);
Reverse
Reverse is used to reverse the order the objects in collection.
// Reverse - Reverse the order of the elements in the collection

var reverseList = query1.Reverse();
Output:

SequenceEqual
SequenceEqual extension method is used to determine if both
collections sequence are equal. In this case the order of the elements
will be different in
query1 and
reverseList so I will get
isEqual =
false.
// SequenceEqual - determines if both the collections sequences are same

var isEqual = query1.SequenceEqual(reverseList);
Skip
Skip extension method is used to skip first nth elements from the
collection. In this case, I am skipping first 2 elements from the
collection and will get rest of them.
// Skip - skips first nth records var skip = query1.Skip(2);
Output:

SkipWhile
SkipWhile extension method is used to skip the elements that
satisfies the given filter criteria till it doens't get any element that
doesn't satisfy. For example, if you have 5 records where 1st and 2nd
records
City is "Hyd", 3rd record
City is "New York" and remaining two records
City is again "Hyd" again. It will give you last 3 records.
// SkipWhile - skips records while a certain condition is met and returns remaining records// this also returns record that has met the condition but exists in the collection after the position the loop has broken

var skipWhile = query1.SkipWhile(s => s.City.Contains("City"));
Output:

In this case, first two records had
City contains "City" word so it skips first two records but kept the 4 record because 3rd record doesn't have "City" in the
City field.
Sum
Sum extension method gives the sum of specified field. In my case I am getting sum of AutoId that will be 51.
// Sum - sums up the specified column

var sum = query1.Sum(s => s.AutoId);
Take
Take extension method is used to take specified number of elements
from the collection. In my case, I am getting top 3 elements from the
collection.
// Take - takes n number of recordsvar take = query1.Take(3);
Custom paging using Linq
You can use Skip and Take extension methods to do custom paging using LINQ that has been explained in this post
http://www.dotnetfunda.com/codes/code874-custom-paging-using-linq-.aspx
Repeater1.DataSource = products.Skip(startRowIndex).Take(pageSize);

Repeater1.DataBind();
In this case, Repeater control is getting the custom paged data from the
products collection.
I have found another great collection of LINQ samples at MSND -
http://msdn.microsoft.com/en-us/vcsharp/aa336746.aspx. You can download the source code of this article from the download link available at the top of this article.
Conclusion
LINQ is a wonderful ways to retrieving data from in-memory collection
objects, its SQL like keyword and syntax makes it easier for developer
having little knowledge of SQL. Hope this article was useful. Thanks for
reading. Happy learning and sharing!

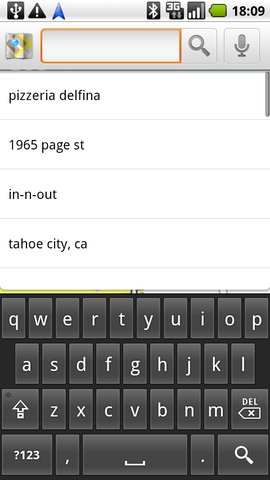
Search in plain English No need to know the address. You can type a business name or even a kind of a business, just like you would on Google.
Search by voice Speak your destination instead of typing (English only): "Navigate to the de Young Museum in San Francisco".
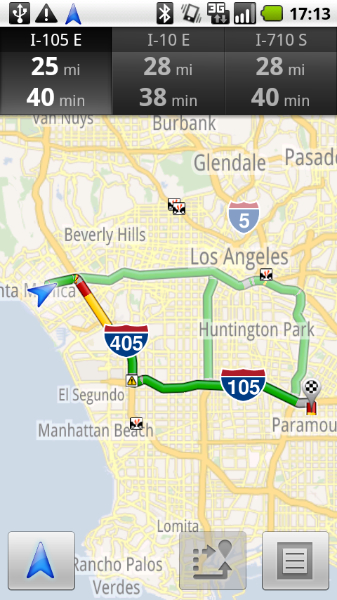
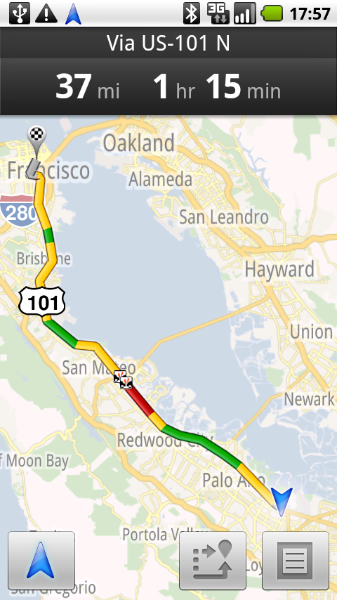
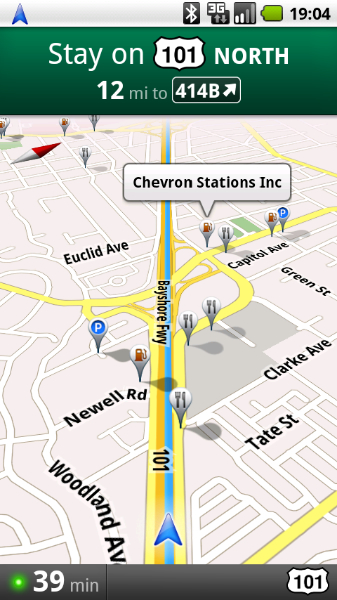
Traffic view An indicator glows green, yellow, or red based on the current traffic along your route. Touch it to see traffic ahead of you.
Search along route Search for any kind of business along your route, or turn on popular layers such as gas stations, restaurants, or parking.
Satellite view View your route overlaid on 3D satellite views with Google's high-resolution aerial imagery.
Street View Visualize turns with Street View imagery. Navigation automatically switches to Street View as you approach your destination.
Car dock mode Car dock mode makes it easy to use your device at arm's length (Android 2.0 devices or higher).
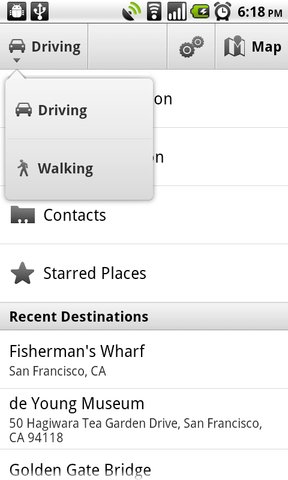
Navigation shortcut Select the Navigation icon from the launcher to start quickly; pick a destination by search (speak or type), contacts, starred items, or recent destinations.
Walking Navigation (Beta) Get voice-guided navigation for walking directions. Device vibrates for turn notifications.
Transit Navigation (Beta) New! Get navigation for public transit directions in 400 cities around the globe. Device shows location along transit route and provides alerts for when to stay on or exit public transit.
Offline reliability Get continuous guidance and automatic rerouting, even if you lose your network connection after you’ve begun a route.


Search results
Alternate routes
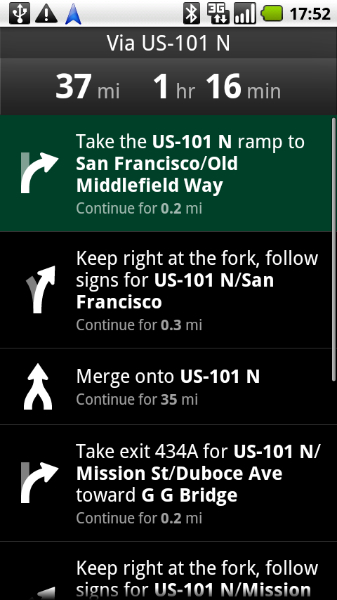
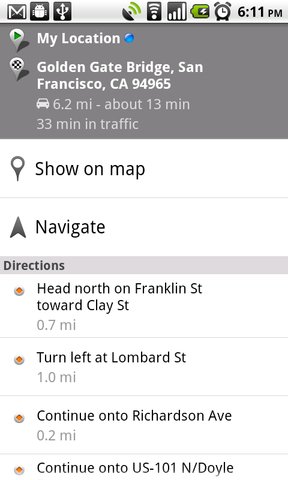
Directions list
Shortcuts
Traffic view
Satellite view
Satellite view
Street View
Street View
Search by voice
Satellite view with traffic
Navigate after getting directions
Popular search layers
Navigation shortcut
Google Maps Navigation